Demonstration of a photorealistic camera simulation using pgrid.
For my project, pgrid, I had to take a lot
of photos with a spherical camera.
Pictures had to be taken on a 20 cm “floor-grid” as precisely as possible.
Excluding a whole-day preparation and figuring out how to do this, the process
took 2 hours 17 minutes, and the result was a set of 404 spherical photos, which
you can download here
(1.6 GB, CC BY-SA 4.0).
The images are equirectangular projections with 5376 x 2688 px resolution.
They depict a section of lab 012 in the Faculty of Electronics and Information
Technology at Warsaw University of Technology.
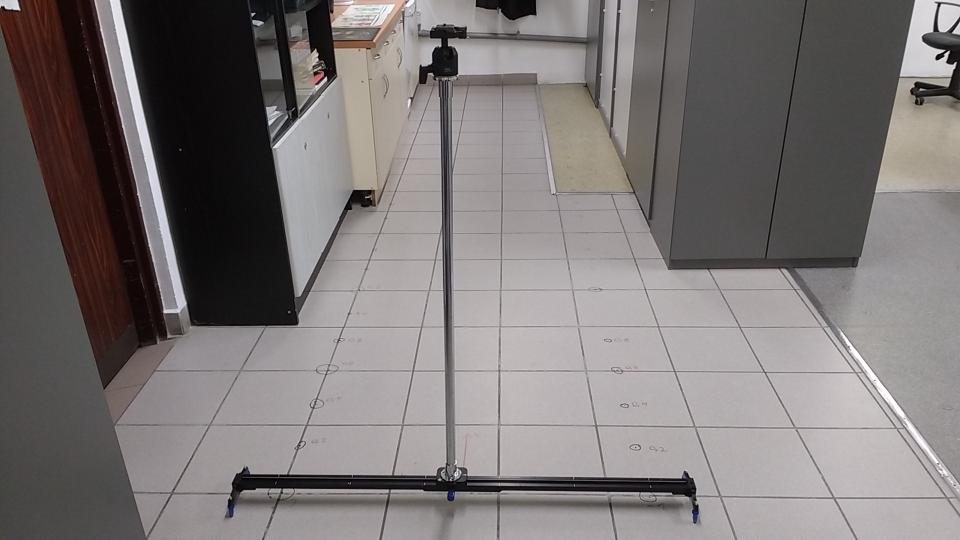
The first order of business was to design and assemble the camera rig.
Maciej Stefańczyk, who came up with the original idea for this project,
suggested using a steel rail with a pole attached to a cart.
This approach seemed better than using a tripod because we could position the
rail precisely and take multiple photos by moving just the cart. This sped up
the process by quite a bit.
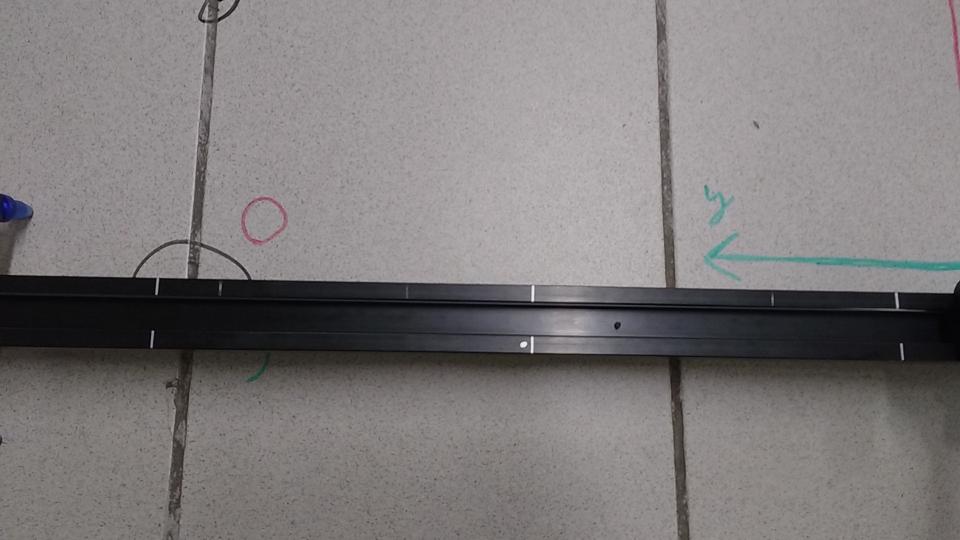
I marked 6 points dividing the rail into 20 cm segments to create discrete cart
positions.

Camera rig. Rail, cart, pole and a camera mount.

Scale drawn on the rail.
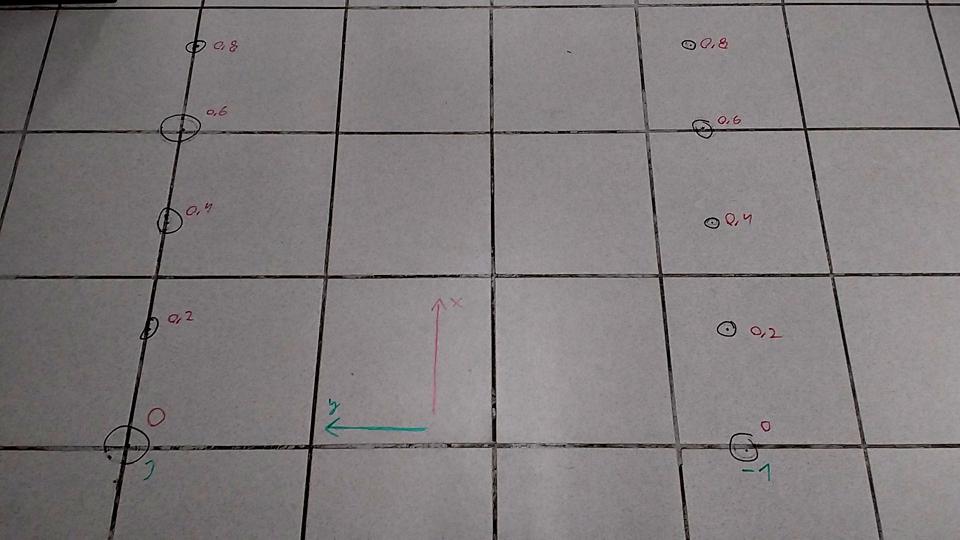
The next step was to painstakingly mark a 20 cm x 1 m grid on the floor.
Points of this grid determined where to place the rail. I chose a reference
point and used a laser level and a tape measure to draw more points. I helped
myself along the way by assuming some parts of the room were parallel (like tile
grouts and the wall), which ended up being a mistake.
I had to redo parts of the grid because errors accumulated and grew to multiple
centimeters.

Points grid on the floor.
In the picture below, you can see a lot of sloppy circles on the floor. They are
there because those small grid points were not well visible, so I drew a circle
around each of them.
I also annotated some points with their coordinates so that in case I got lost
while taking the photos, I would be able to align quickly.
Now let’s go back a few days. I was looking for a way to automate taking photos
and annotating them with coordinates.
The spherical camera I used was
Ricoh Theta V, which Maciej kindly
lent to me.
This camera has a Wi-Fi interface and runs an HTTP server, to which you can make
API calls. It uses the
Theta Web API, which is compatible
with the Open
Open Spherical Camera API.
I created an app that would take pictures and keep track of filenames and
coordinates.
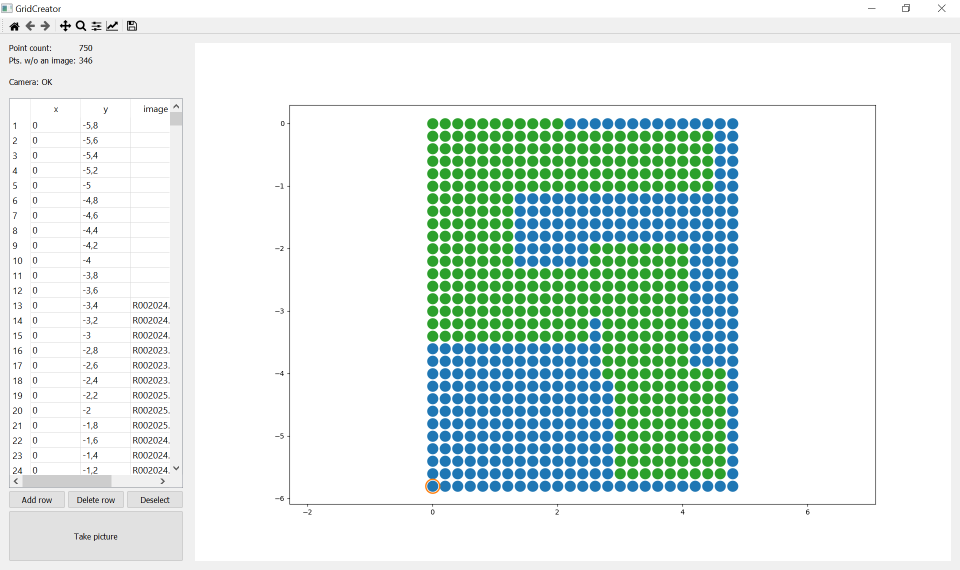
I don’t have much experience in UI/UX, so the best I could come up with is a 2D
scatterplot, which shows pending points (blue) and points where a photo was
already taken (green).
The user had to click a point and then press the “Take picture” button to
execute the camera.takePicture command.
Then the app polled the command status endpoint to wait until the camera has
finished processing.
After the image was ready, it saved a line containing the filename (retrieved
from command status) and coordinates to a text file like this:
R0020155.JPG    3.6_-5.6_0.0.jpg
R0020154.JPG    3.6_-5.4_0.0.jpg
R0020153.JPG    3.6_-5.2_0.0.jpg

Screenshot of the app after taking all 404 photos.
Fast forward to the picture-taking day. Maciej offered his help, so we split
responsibilities.
He sat behind a desk, hidden from the camera, with a laptop and operated the app.
I, however, was repositioning the camera and hiding while he was taking pictures.
Watch
this short timelapse
to see me in action.
After the work was done, I downloaded the images from the camera and devised a
simple script to visualize our timing based on Exif metadata, which contains
timestamps of images.
Below you can see the plot with time on the horizontal axis and the number of
pictures taken on the vertical axis.

Timing plot.
Expand to see the script.
#!/bin/sh

script=$(cat <<EOF
	set terminal svg background 'white';
	set datafile separator ",";
	set ylabel "total photos taken";
	set xlabel "time [h]";
	plot '< cat -' with dots notitle;
EOF
)

timestamps=$(exiv2 *.jpg \
	| awk 'BEGIN {FS=" : ";} /Image timestamp/ { print $2; }' \
	| sed 's/^\([0-9]*\):\([0-9]*\):\([0-9]*\)/\1-\2-\3/g' \
	| xargs -I {} date +%s -d "{}" \
	| sort)

first=$(echo "$timestamps" | head -n 1)
relative=$(echo "$timestamps" | xargs -n 1 expr -$first +)

total=$(echo "$relative" | tail -n 1)
seconds=$(expr $total % 60)
minutes=$(expr $total / 60 % 60)
hours=$(expr $total / 60 / 60)
>&2 echo "Total: $total s = $hours h $minutes min $seconds s"

echo "$relative" \
	| xargs -I {} echo "scale=2; {} / 60 / 60" \
	| bc \
	| awk '{print $0",",NR}' \
	| gnuplot -e "$script"
We took two long breaks, about an hour after the first photo and then half an
hour after that. There were also a few short breaks.
The main reason for them was the need to move something out of our way that I
missed while preparing the space the previous day.
All in all, our average picture-taking speed was 2.9 pictures per minute.
Now it’s time for reflections about the whole process.
Let’s start with the camera rig.
The pole was poorly secured to the cart because the screw holes were not
compatible with each other.
We could have drilled into the base of the pole to make it more stable.
Due to a bit of wobbliness, images are more or less rotated around the mounting
point of the pole. The effect is not easily noticeable but is definitely present.
This problem can be corrected by performing a transform on the images, but this
is material for another blog post.
The grid I drew on the floor was not that precise.
It’s because I unnecessarily rushed this task and didn’t give it enough thought.
Also, a tool like a long, rigid straight angle would help to make it better.
I also thought of using a sheet of some kind with a grid drawn on it.
It could have been placed on the floor, and the rail would be positioned
according to it.
The only issue would be moving the sheet without changing its orientation, but
again, a long straight angle would help.
The last issue was the software. I mean, it wasn’t that bad, but I noticed some
room for improvement.
The app indicated when the picture was done by showing it in the GUI.
After Maciej saw this, he verbally communicated that I could leave the hiding
spot and move the camera to the next position.
This communication path could be shortened if the app made a sound when the
picture was taken.
Then the person operating it could focus on keeping track of coordinates and
not on communicating with the other person.
The app was also too mouse-focused. Clicking points and then clicking the
“shutter button” was repetitive and could have been less of a hassle by making
it more keyboard-friendly.
Points could have been selected by arrow keys (or
hjkl) and pictures taken with the spacebar.
I think that we could vastly increase (if not double) our average
pictures-per-minute by fixing just the software issues.
All in all, this part of the pgrid project
was a lot of fun.
It required skills from a few domains to execute, but I learned a lot, which is
very rewarding.
This set of spherical photos can be used to photo-realistically simulate a room,
which has its uses in service robot simulation.